How to plan your simulator
Infinite possibilites - Overview
The world of flight simulation is full of possibilities. A hobby with the potential to be an exciting and broadening challenge for years to come. Hardly any other leisure activity offers more possibilities to unfold than a flight simulator cockpit. This document will help you to get started with your own cockpit. If you have any questions - please do not hesitate to contact us.
Build your cockpit
Your eyes will light up when you hold the first panel with switches and buttons in your hands. Building a flight simulator is exciting. No matter if you prefer a ready-made cockpit or build each component yourself. The route is the goal.
Flight training
Once your cockpit is ready and you can start flying. At the beginning maybe just in sunny weather and without too much wind. Later you fly at night, low clouds and in difficult areas of the world. The challenge is even bigger when the system elements suddenly fail.
Join a virtual airline
In a virtual airline you can take a job as a pilot and start your career. Flying in a group is usually more fun and you get new ideas on which you can measure your flying skills.
Fly online
Travel the world
Have you ever thought of making a trip around the world? Fly in areas outside your home country guided by local controllers. Unknown regions and foreign-language controllers will make flights a special challenge.
Page Navigation
Space requirements
Overview
Before you buy a cockpit will certainly think about your premises and your available space. Not everyone has the ideal room size of 5 x 5 meters available. This is absolutely not necessary, because there are a lot of possibilities to fit a cockpit into an existing space. We have listed some ideas below, distinguishing between a closed shell and an open shell frame.
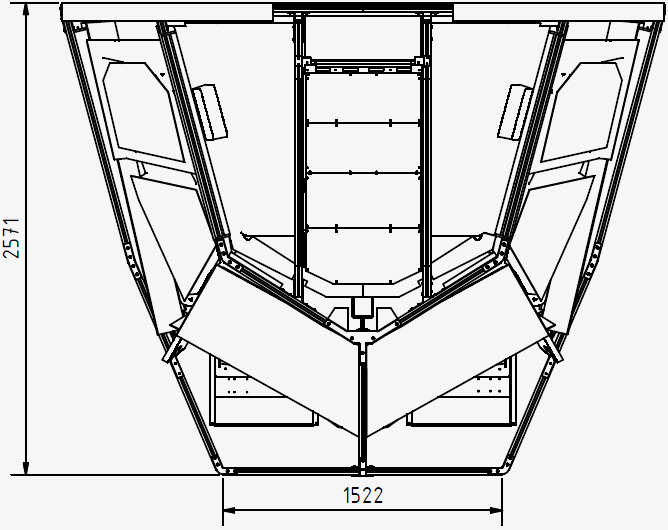
This is the size of a standard 1:1 scale A320 cockpit shell:
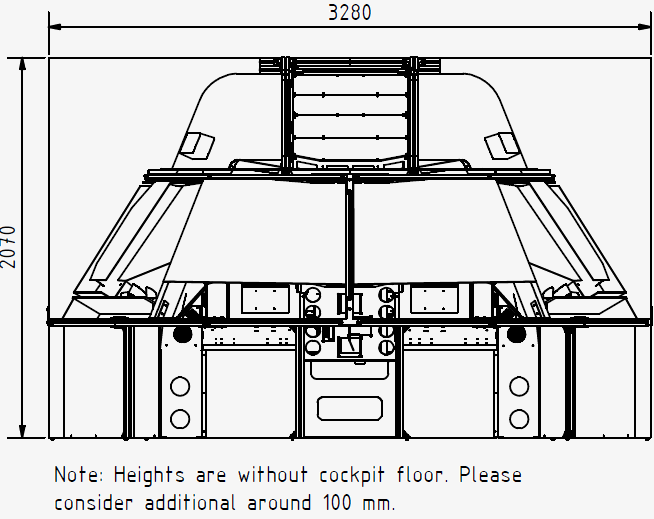
Open Trainer
If you don't have enough space you can easily start with our shell frame solution. There are many options and sizes available that fit every room. Most parts of the open construction can be used later for a closed shell. If you prefer to start small you can upgrade in the future. We also have solutions for single seat cockpit.
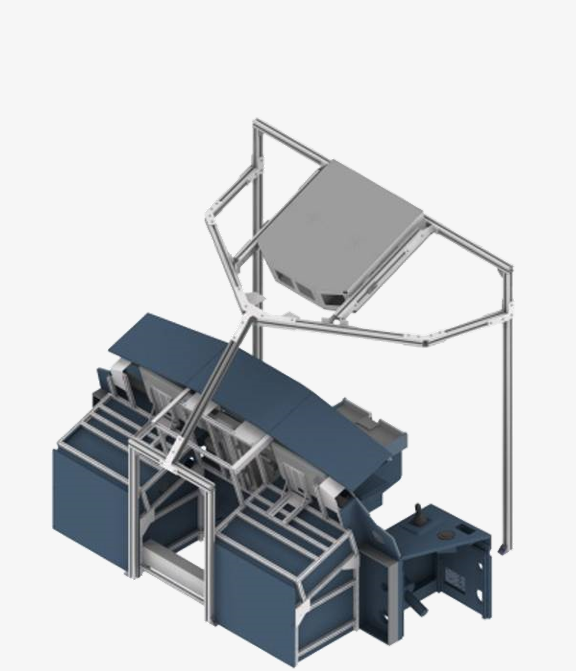
Shell Frame Mini
This shell is for minimum available space and can hold the front overhead section. It uses the same fittings as all of our shell frames and can easily be extended to a larger size.
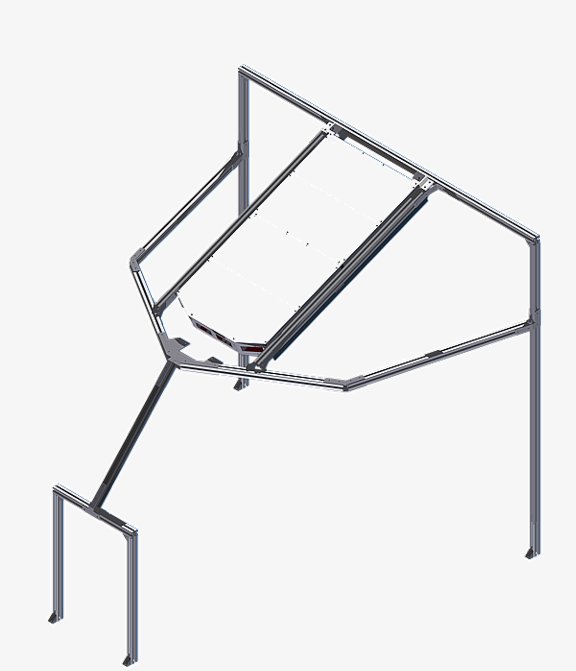
Shell Frame Medium
"Pim" was the name of our customer who had the great idea for a shell frame with minimum size, but can hold front and aft overhead section. Thanks, Pim for the great idea!
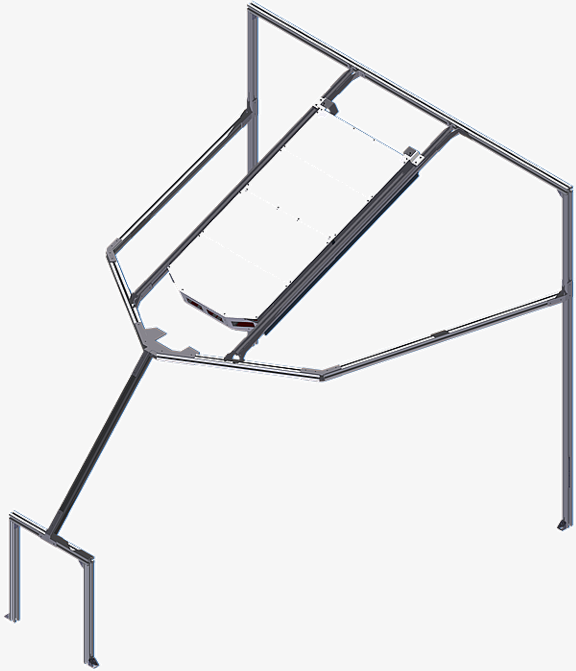
Shell Frame Light
This shell frame has the original size. It can be extended to a 1:1 size fully closed shell.
Closed Shell
Two of the shell frame types can easily be extended to a fully closed shell. The shell frame standard and the shell frame size M. The shell consists of a Shell Frame Standard to which the various Lining Kit Elements are attached. The combination then results in a closed cockpit, which corresponds in its dimensions to an original cockpit.
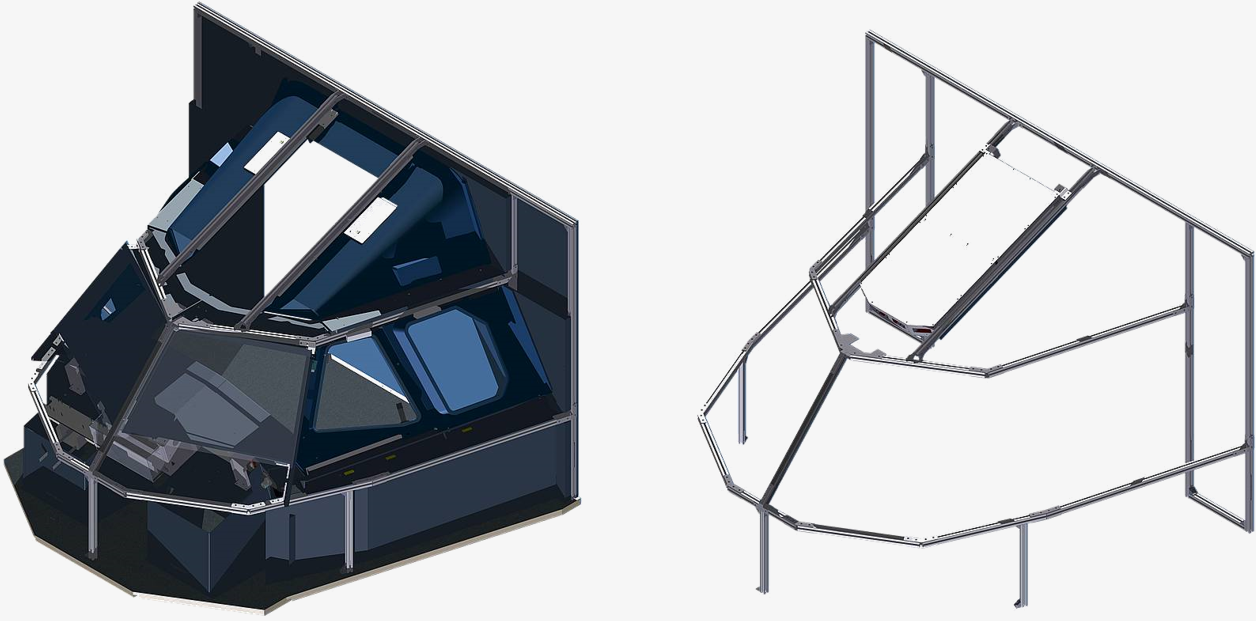
Closed Shell - Size M
We designed the Shell Size M to enable a closed cockpit even in slightly smaller rooms. This cockpit consists of a combination of Shell Frame M and various shell elements. In contrast to the standard shell, the Shell Size M ends in front of the rear side window. All proportions correspond to the original. Due to the shortened shell, the Aft Overhead Panel has to be dispensed with, but this has practically no effect in regular flight operations.
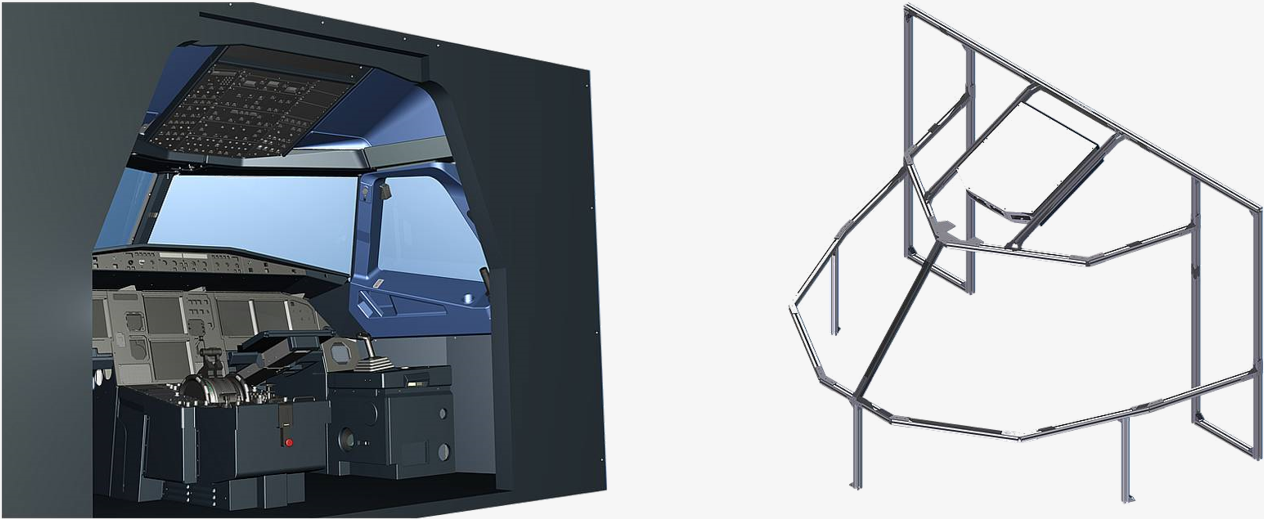
You will find all dimensional details for your planning in our documentation section.
Room design
How the simulator is best placed in space is of course subject to an individual planning. However there are a few things you should keep in mind.
Ventilation
The simulator generates a lot of heat. And also two pilots, who fight with the plane depending on the weather and situation, increase the heat in the cockpit.
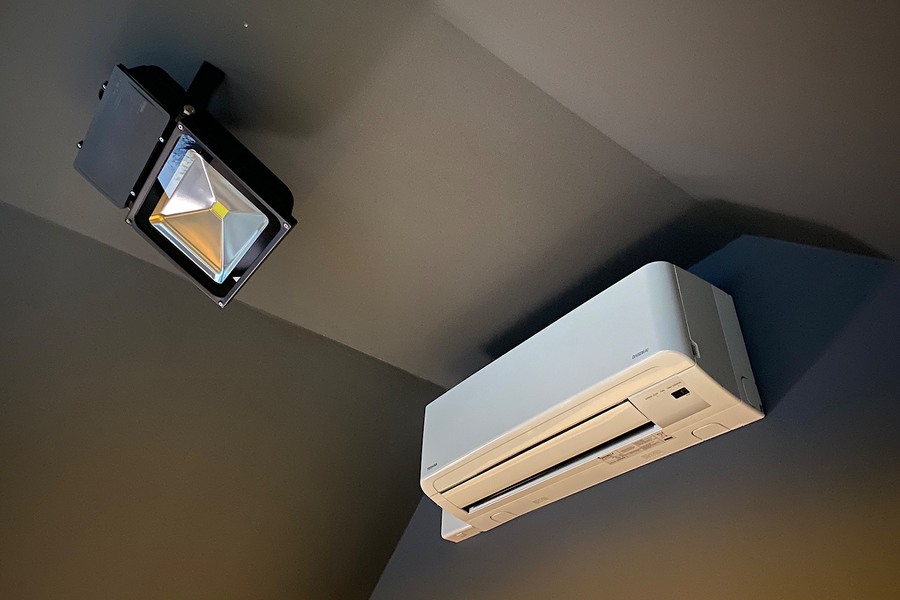
Especially with a closed shell, you should consider ventilating or - even better - an air conditioning system, so that you can enjoy the cockpit for a longer time.
If you plan to use windows in your ventilation concept, make sure that they do not interfere with the projection due to the light coming through.
Accessibility
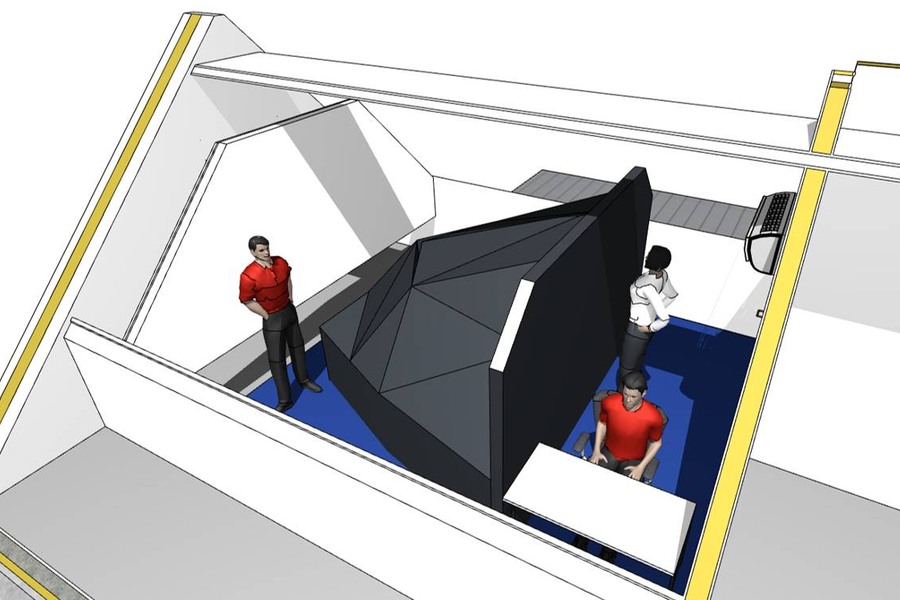
The access into the cockpit is usually done from the back. Make sure you have sufficient space behind the cockpit entry. A good figure is 120cm or more.
In case you plan passenger seats behind the cockpit you can always ask us to extend the flight deck floor.
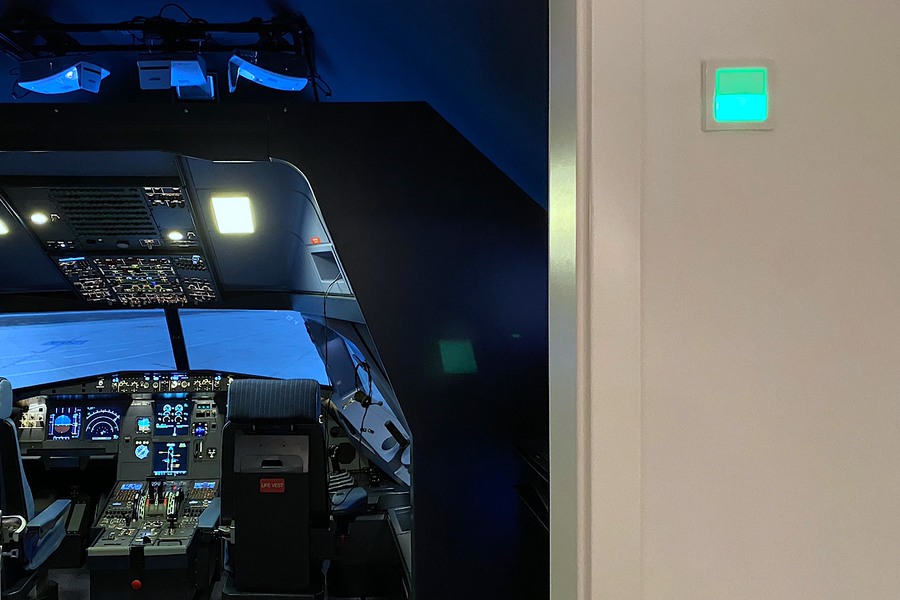
As an idea you can connect the door switch in the cockpit with an access light outside. Green means come-in, red means door locked. However, access to the cockpit should be possible at any time for security reasons.
Maintenance
Make sure you can still access the cockpit from the front. Under normal conditions you will not need to work in the front but for maintenance it's a important that you can reach all areas.
Did you know that our full shell cockpits have an optional fabric cover? This cover protects the cockpit from dust and prevents any light from the outside. But the biggest advantage is that you can easily access all areas of the cockpit.
Wall paint
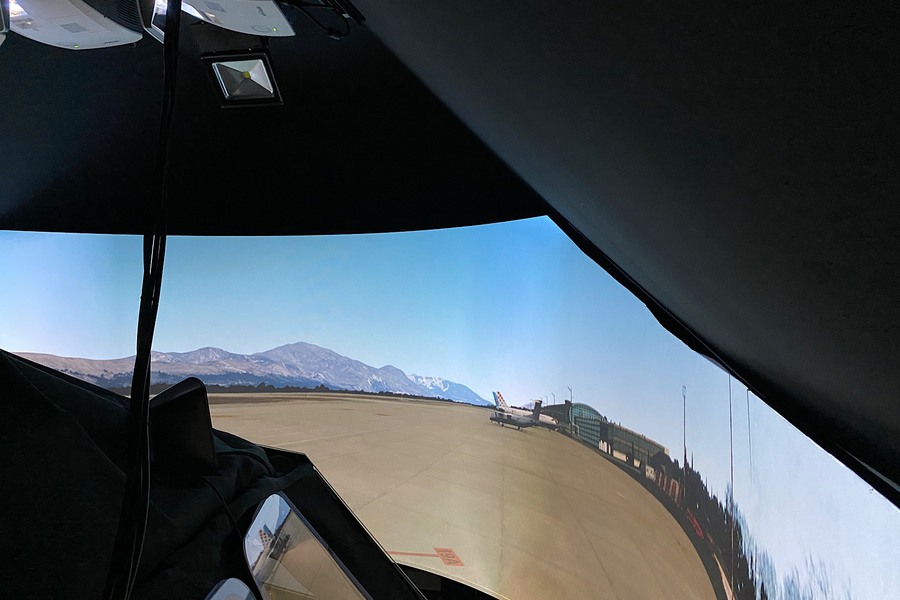
There is one aspect you should not underestimate. The color of the wall. Less reflections from the areas outside the projection area significantly improve the overall impression of the simulation.
Consider painting walls and ceiling in a matte black color or wallpaper. Due to the small reflections you should integrate several strong maintenance lights.
Projectors
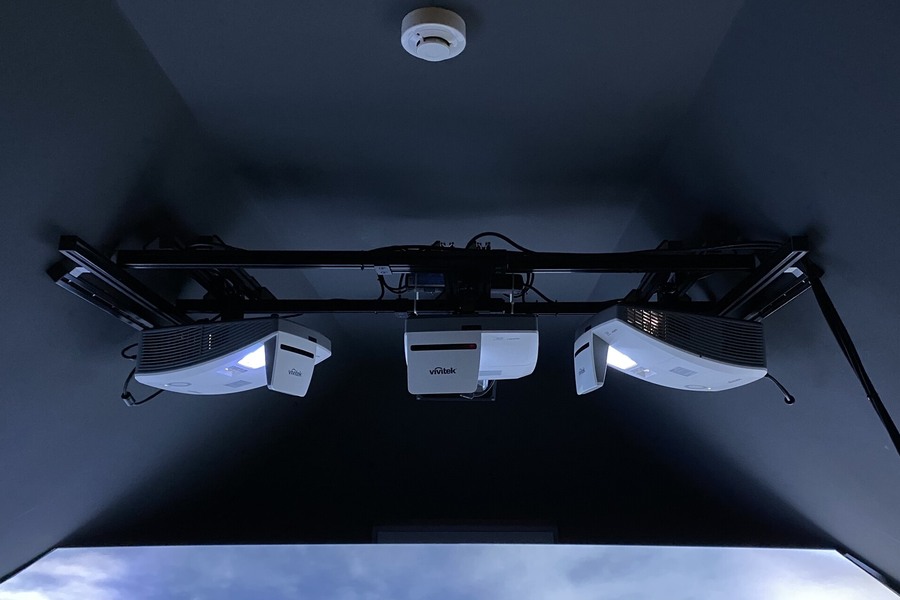
You should mount the projectors on the ceiling and not on the simulator. Otherwise, the image will wobble when you move around in the cockpit.
In our experience, the projectors are located above the cockpit. So make sure you have positioned the projectors before assembling the cockpit. You can find more information about the assembly strategy in our Members Lounge.
Computers
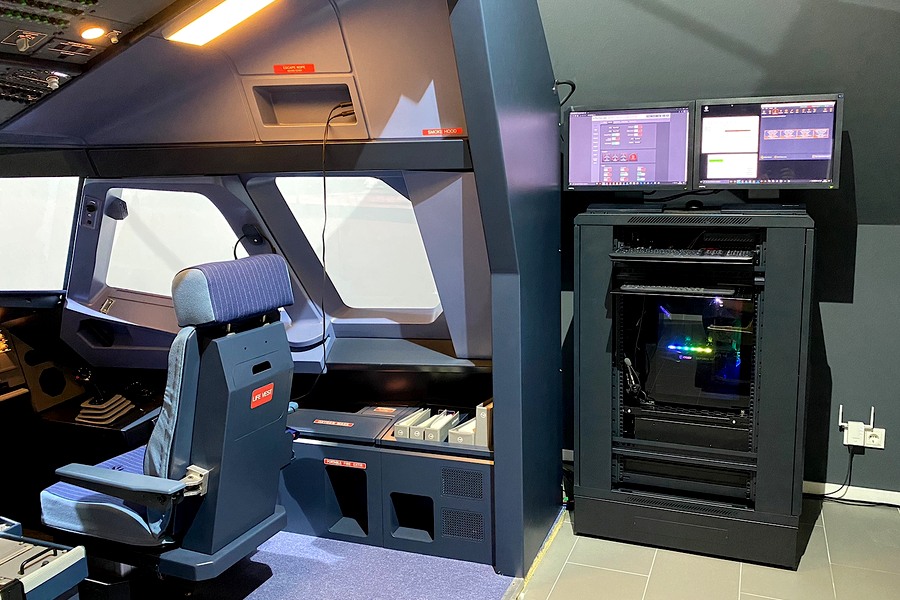
We recommend to place the computers on the left or right to the cockpit shell. This will allow an easy access.
Cable lengths of up to 10 meters are no problem, but make sure you don't buy the cheap ones. You should use active USB cables for longer distances. In addition a maintenance monitor is always a good idea.
Your computers should be connected to the internet. Consider a separate router to interface multiple computers.
Power consumption
Depending on the computers used and the number of projectors, a simulator can be operated on a single line (220V with 16A).
Since a power line is heavily loaded when the devices are switched on, we recommend an inrush current limiter as standard. This limits the power consumption to the maximum permissible value. In case of doubt, please consult your local electrician.
Air conditioning should be connected to a separate power line.
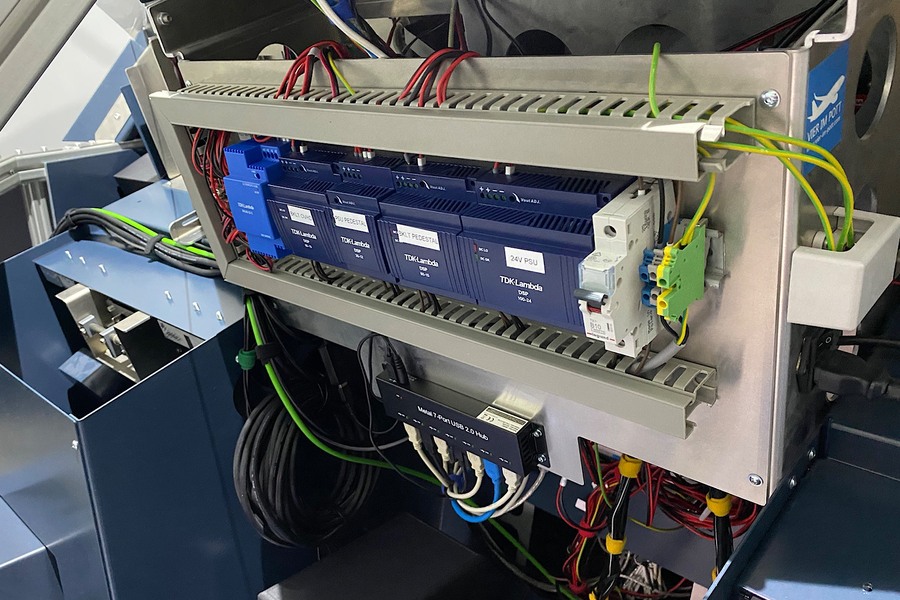
Computers and projection
Projection
Multi projector setup
The use of three projectors is the best option to create a great flying experience, because it allows the arrangement of a surround view through the cockpit windows. There are several options available from 180 to 220 degrees or horseshoe. All projection areas can be delivered in various dimensions starting from 3.8m diameter.
The projection needs to be individually calculated for all customers. The possible dimensions depend on the room dimensions, the ceiling height and the type of projector. However so far we always found an impressive solution for all of our customers.

Single projector
If you don't have the space for a projection area even a single projector can create an impressive visual. The wider the projection area, the better. Consider using an ultra-short-throw (UST) projector.
Single display
TV screens can also be used in particularly small rooms. Displays have an impressive color range. You should look for a 4K monitor. The bigger the better.
Multi display
You can also use more than one display. However you should not use two displays, because you will see the runway right in the middle of both monitors. A three display setup with 3 x FullHD makes more sense.
Computers
In general you will need two computers. One for the outside view and one for the avionics. While many people discuss frame rates for the outside view it's also important to consider higher refresh rates on the avionics screens especilly under IFR (instrument flight rules). If you use a single display for the outside view you may use a single computer.
Visual Computer
This computer runs the simulation software and the outside view. You should use a really powerful CPU and a very good graphics card. Since flight simulation software still highly depends on calculations outsaide the graphics board don't underestimate the need of an actual CPU. Consider connecting a maintenance display for an easy access in multi projector environments.
Avionics Computer
This computer runs all cockpit displays. CPT, F/O, Center and two MCDU displays. Also consider a maintenance display because cockpit displays are partly covered from the MIP. Though you don't need a very powerful computer you should keep in mind that you will need to connect up to six displays. We recommend using the on-board graphics card for the two MCDU(!) screens due to performance reasons.
Sound
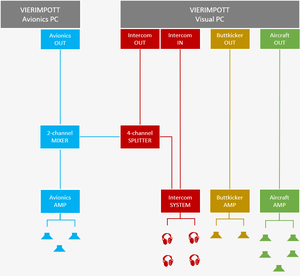
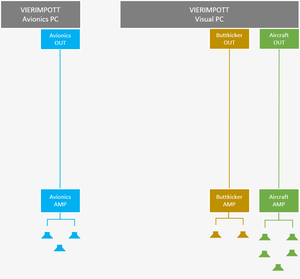
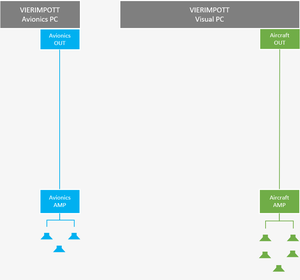
Audio effects are very important for your flight experience. Engine sounds, butt-kickers, aural warnings and intercom have a large impact on how impressibe your simulation will be. The schemes below show some options from easy to advanced. In case you are interested in further details, please let us know.
Wiring and Network
Previously, the wiring of flight simulator components was a real challenge. Today, all this is relatively easy and the times when you need a soldering iron are a long way off. We have taken particular care to ensure that cables can be plugged together without any technical knowledge. For the commissioning, all cables are already largely pre-configured.
The computers are connected via a local switch to ensure are fast network communication. All of our components have USB-connectors. Industrial high quality USB hubs and active USB cables ensure a stable connection. We will provide all needed power supplies for the electronics and the backlighting.

Software
Overview
You need various software packages to run a flight simulator cockpit. In former times installation was quite bumpy. However this has changed and today everybody with the will and the patience can set-up the software. Basically the simulation runs on a Windows 10 or 11 operating system. In addition you will need an environmental simulation and an aircraft simulation software that is suitable to be interfaced with the cockpit hardware. Below you will finde the most common options.
Environmental Simulation

Prepar3D is the development of the former Microsoft FSX. Lockheed Martin is actively improving this software and currently P3D is the most common standard in hardware flight simulation for private and professional customers.

MSFS2024 has recently been published by Microsoft. This simulation software creates impressively realistic graphics powered by satellite maps deducted from Bing. However the flight dynamics are currently not even near to be called realistic. (Aug. 2025)
Aircraft Simulation

The aircraft software simulates the systemic behavior of the A320 cockpit. So all switch functions, ECAM messages, artificial horizon, etc. Since many years now we work closely with ProSim-AR and we recommend this software due to its simple installation and continuous improvement.

The software has been developed by an former ATC controller in Nice, Jean Luc Jeehell. The special appeal of this software is that it is free for the private user. The installation is a bit more demanding. However it's a good option to start with and the support community is quite large.
Warping and Edge Blending
The warping and blending software is required if you want to operate your simulator with multiple projectors. The software ensures a distortion-free and seamless transition between the projection surfaces of the individual projectors.

We recommend Fly-Elise Immersive Calibration and Display Pro. For more than one projector you should use the Ultimate Version with a hardware dongle. The installation can be done by an average experienced user. However you should read the instructions carefully.
Add-On Markets
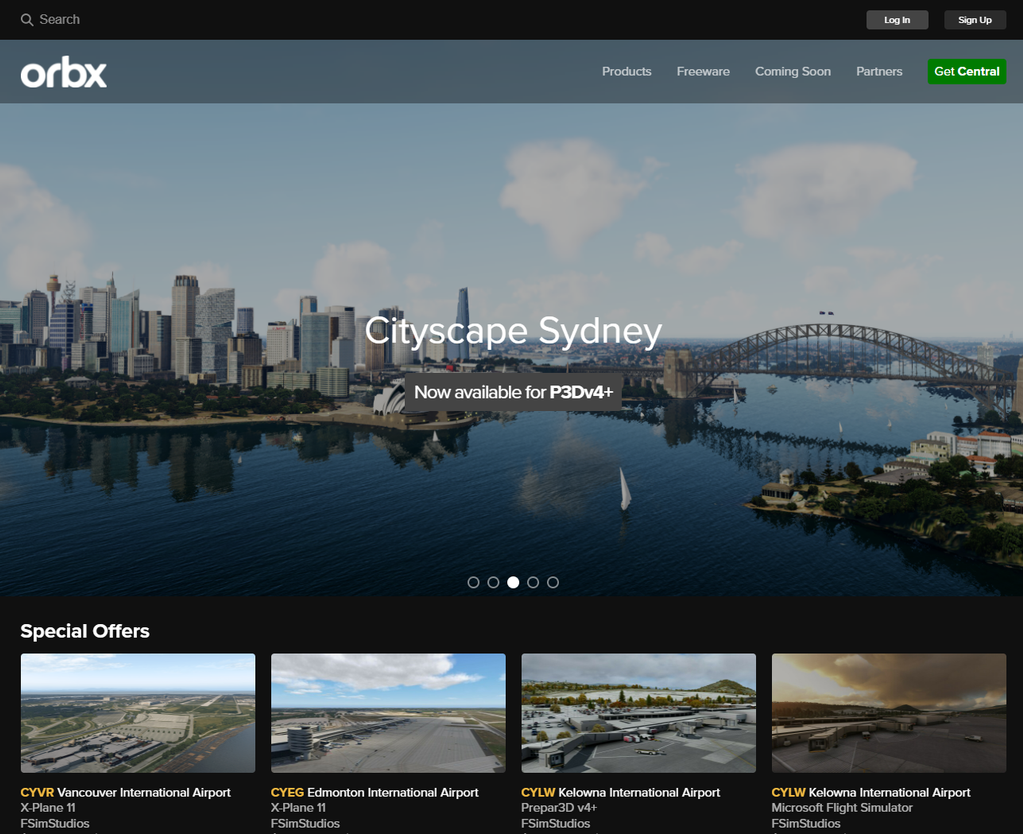
Orbx has a lot of landscape and airport scenery improvements. If you plan to enhance your environment there is literally no way around Orbx. We personally like the integrated installers the alllow an easy maintenance of all your add-ons.

At SimMarket you will find a lot of add-ons within and outside the simulator. It's a platform for all kind of vendors and always wirth a visit.
Must haves
Despite of the mandatory software you need to run an A320 flight simulator there is a couple of additional software you can use to increase realism and flight experience. Here are some ideas for additional software you might like. This list is based on our personal experience without claim of completeness.
Weather
Hifisimtech provides a software called Active Sky P3D. This add-on allows you to inject real weather into your simulator environment so that you can always fly under the current weather conditions. It also provides historical weather so you can recall interesting weather conditions any time.
https://hifisimtech.com/downloads/#ASP3D
TOGAprojects has quite nice software to improve colors, shadings and textures to acheive an ultimate visual experience in your simulator. We like the combination of Envtex and EnvShade especially in a multi-projector environment.
https://www.togaprojects.com/envshade
Navigation Data
Navigraph provides actuell navigational data for your flight planning and navigation systems. It has interfaces to all majore software add-ons that requires navigational data like waypoints, SIDs, STARs etc. We love the fact that you can use this software on PC and iPad as well. For us this software is mandatory if you want to keep your navigational data up do date. Navigraph provides this data based on a subscription model with a yearly fee. Data update is very easy via a download manager.
https://navigraph.com/
Engine Sounds
Turbine Sound Studios offer a great replacement for the A320 engine sounds. For CFM as well as for the IAE engines.
https://www.justflight.com/product/tss-airbus-320-iae-v2527-pilot-edition-v2-sound-package
Ground Services
FS2Crew offers an add-on called Ultimate Ground Crew X. This add-on is integrated into P3D and provides several interactive ground services like Push-Back, follow-me car, marshalling and serveral emergencies. If you want to improve your ground experience then you should have a look into this tool.
https://www.aerosoft.com/de/shop/p3d-fsx/flight-simulator-x/tools/3081/fs2crew-ultimate-ground-crew-x
Flight Planning
Simbrief is the first point of contact if it comes to flight planning. This web based application makes flight planning really easy. You will not only get a very detailled OFP. You can also export your flight plan to different applications like P3D and other. Very useful: you can directly import a simbrief flightplan into the ProSimA320 FMS so that you don't need to type in your route manually.
https://www.simbrief.com/
SimToolkitPro is a very powerful flight simulation companion that provides a huge load of functions all around your flying activities. Flight planning, flight logging, landing reports, flight historie, live map, etc.
https://simtoolkitpro.co.uk/
Virtual Crew
Self-Loading-Cargo is a real-time simulation of passengers and cabin crew. It allows you to interact with a virtual crew, take care of passengers and make sure that your flight behaviour stays within acceptable limits. Otherwise you will hear screaming passengers....
https://www.selfloadingcargo.com/
Further Questions?
We hope the information on this page was helpful. Whether you want to build your own simulator, invest in a step-by-step way or head for a turnkey solution. Please contact us. We are happy to help.

